The Charcutepalooza follow-up: Makin' bacon. 9 pounds in 9 days in 9 easy steps.
 Tuesday, February 15, 2011 at 3:59PM
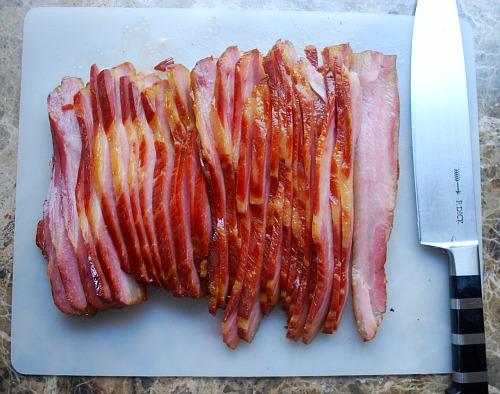 My Sweet Sorghum Bacon. The cure mixture created a beautiful "meat gloss".
 '
'
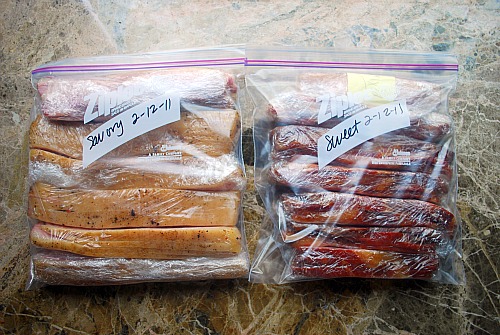
Savory Bacon, and Sweet Sorghum Bacon, sliced and packaged for the freezer.
Yes, I'm starting out by showing you the finished product. As a preserver, one of my favorite things is looking at a jar of jelly or jam, a bottle of syrup or infused vodka, or a crock of pickles or kim chi. I can now add to that ever-growing list of favorite preserved things: "a bag of sliced home-cured bacon".
Sure I can believe I made my own bacon over the past week or so, but I can barely believe how easy it was.
Looking at the packages of sliced bacon gives me the satisfaction I can only get from knowing I started with carefully-selected raw ingredients and with some kitchen alchemy, turned them into something wonderful.
It's a feeling I can't get enough of.
So again, from my last blog post, titled "I'm busy makin' bacon for Charcutepalooza!", here's the pork belly:

Here's the pork belly sliced in fourths:
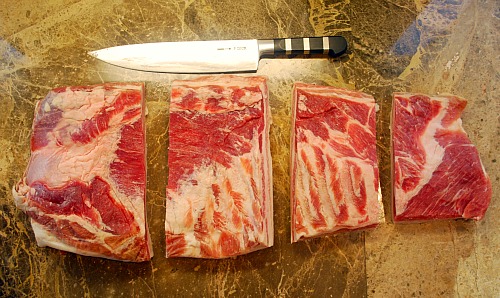
And here's the pork belly, er....I mean...BACON...9 days later:

This is my follow-up blog post, so I'll finish where I left off last week...
...the pork belly/bacon was in the fridge, curing, in lidded plastic containers, for one week. I turned the pieces over once or twice per day, and each time made sure the herbs, spices & "salt mixture" were rubbed into the savory slabs, and the brown sugar/sweet sorghum blend & "salt mixture" was evenly coating the sweet slabs.
 Pork Belly/Bacon -- savory version
When the week was up, I rinsed the slabs off:
 Rinsing salts, herbs & spices off of pork belly.
And patted them dry with paper towels:
 Pork Belly/Bacon -- Sweet Sorghum version -- being prepared for the next step.
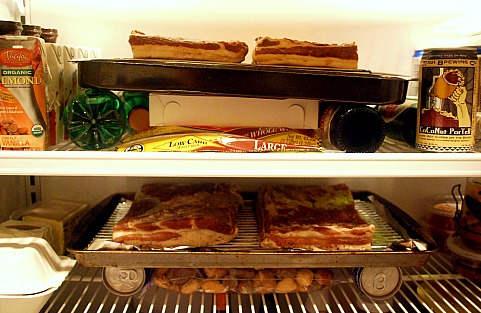 Two pans of bacon -- one savory, one sweet -- "drying" in fridge.
Next, you need to put the pork belly/bacon on racks in the fridge so that it can dry and form a pellicle. What's a pellicle? It's a thick shiny coating that appears on the top of the meat. This coating is basically the hardening brine. The pellicle will help the bacon absorb some flavor while it is being smoked. It might only take a couple hours, but I followed the lead of others and let it sit overnight, to be sure it was truly dry.
I didn't end up smoking the meat; that's another story. But I trusted Ruhlman's "charcuterie" book; it said I could finish it beautifully in the oven, and Ruhlman was right!
The next day, either smoke the bacon -- using a variety of methods -- or even easier, take those same racks and stick them in a preheated 200 degree oven until the meat reaches an internal temperature of 150 degrees. This will take anywhere from 1 to 3 hours, depending on the thickness of the meat, and your oven. Simple!
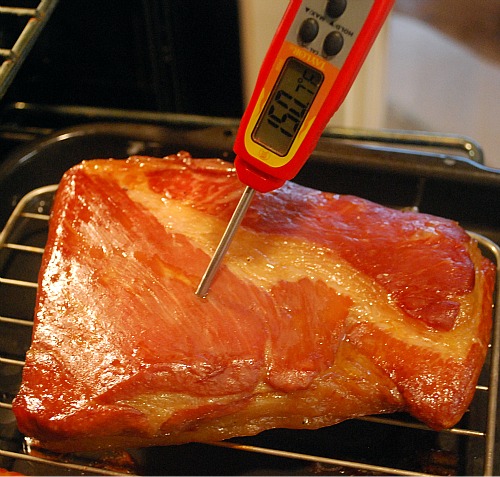
I have a convection oven, but I still decided to rotate the pans every 15 minutes, to be sure things were cooking evenly. It took my pork about 90 minutes to reach 150 degrees. The two thinner pieces were finished about 10 minutes sooner.
Let the bacon cool a bit, and then slice it up:
 The first slices of my Savory bacon...success!
I think I actually giggled I was so happy.
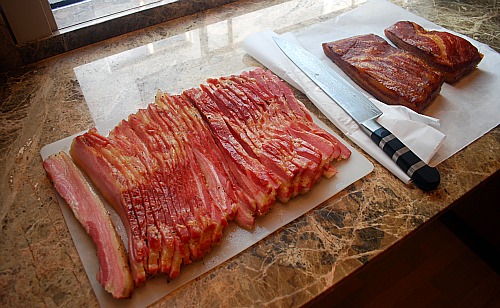
The two larger pieces of pork belly ended up as Savory Bacon -- all sliced up -- on the left. The smaller pieces are Sweet Sorghum Bacon. They are on the right, waiting to be sliced.
I fried up 2 slices, cut in half, in a small skillet:
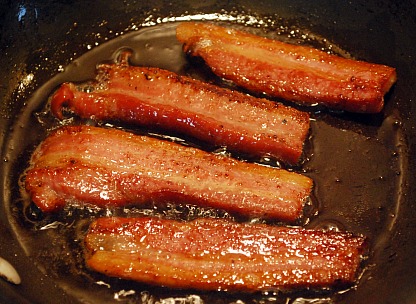
What did I make with my first batch of home-cured bacon? Wilted Spinach Salad of course. It was the easiest-bestest way I could think of to use both the bacon & the glorious grease in one dish*.
Sorry, no photo of the salad. It was super tasty but I don't want to steal the spotlight from the real star of my Charcutepalooza show: BACON!!!
Oh, those 9 easy steps?
1.) Start with some pork belly. Even one pound.
2.) Mix up the cure mixture and rub it all over the pork
3.) Let it sit in a bag or container in the fridge for a week, turning it daily.
4.) After one week (or so) rinse the cure mixture off the meat.
5.) Pat dry.
6.) Dry the pork on a rack in the fridge overnight.
7.) Smoke or slow roast meat in a 200 degree oven until it reaches an internal temp of 150 degrees.
8.) Store in the fridge for 2 weeks, or the freezer for longer. I sliced mine before packaging it in small'ish packages, mainly because I want to give it away to lots of friends. I know, I'm a show-off!
9.) Cook your bacon in various ways and enjoy it -- and it's grease -- as many ways as you possibly can!
*Another fabulous way to use both bacon and bacon grease in one dish? FarmGirlGourmet's Cornbread with Crispy Bacon and Corn. This recipe is reason enough to spend over a week making your own home-cured bacon!!!
 Brook Hurst Stephens | Comments Off |


Reader Comments (7)
That looks AWESOME Brook! Great work! I'm suddenly craving a BLT - STAT! :) I'm inspired!
Farmgirl Hugs to you!
Heather
Brook, that is so impressive! I know everyone says bacon is so easy to make, but I never believe it. You may have convinced me. Great job!
Beautiful post and some really gorgeous bacon. Seeing a big mess of shiny thickly-sliced bacon makes me giddy, and today has been a whole fest of giddiness! Every time I taste my new bacon, I just get silly with happiness :-)
Great pictures, I see you are using a German crafted knife "F.Dick" how do you find it?
Thank you so much! I wish I could tell you exacty where that knife came from, but it was a gift. I have emailed my friend to find out where he got it. I know it was purchased in Seattle, at either Sur La Table or a cutlery store in Pike Place Market, right next door to the original Starbucks store (yes - the very first Starbucks ever!)
Lovely! I love that you did two types (sweet and savory) and I loved hearing about the pellicle and I was really surprised that these were not smoked, they looked so gorgeous and glossy. Nice work! And yes, never, but never throw out the bacon fat!
Thank you for your comment Julia.
I would have thought that bacon HAD to be smoked too, until I finished it in the oven and had such wonderful results.
Because you posted a comment, I clicked on your link. I want you to know that I really enjoyed your blog about oven canning. I can't believe I don't have the Blue Chair Jam Cookbook yet. I ordered it on Amazon before it was released, but then changed my mind, hoping to wait until she came to Seattle and I could get an autographed copy. How's that for positive thinking? So much for my plan....I think she's been here twice in the past several weeks. All I know is I was out of town when she was here in December :(
Thanks for inspiring me to learn even more about canning!
B